December 8, 2014
 Scanning is a function offered in most offices today. It provides a quick and easy way to send, file and duplicate files electronically. PDFs and other hard copy files can cause frustrations when they need to be sent electronically, but the scan-to-email function on multi-function printers solves this issue. Knowing how to scan a PDF and email it to yourself or others can create efficiencies, improved communication and enhanced accessibility.
In this step-by-step guide, we’ll walk you through the process of using your Konica Minolta MFP to properly scan a document and send it to a recipient via email.
Getting Started
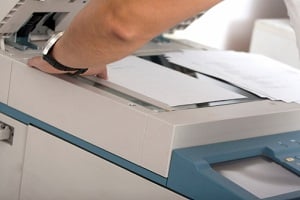
Access your Konica Minolta’s main screen and place your document(s) in the feeder tray, face up. If your company has secured printers, you’ll need to swipe your employee ID card and/or enter your username and password to access the device. From here, you’ll want to select the Fax/Scan function to access this sub-menu.
In order to most effectively scan your documents, you’ll want to review the settings; you can access the settings menu by tapping on "Scan Settings." This button is located on the bottom left of the Fax/Scan menu on most Konica Minolta MFPs. Once there you can adjust the settings for the following:
- File type (text, photo, etc.)
- Resolution
- Density
- Color/B&W
- Simplex/Duplex settings
The first thing you’ll need to do in this menu is select the type of document you wish to create. Click on "File Type" to select the type of document you wish to create with your scan; options include XPS, Compact XPS, JPEG, TIFF, Compact PDF and PDF. If you’d like to store your file electronically as a PDF, which is the most common file type chosen, select PDF and push OK.
You will be returned to the scan settings menu where you can continue adjusting your settings. Another common adjustment that can be made is Simplex/Duplex scanning; if your file is originally double-sided, you’ll need to select the Simplex/Duplex button and change the settings to double-sided. When completed, select OK and you’ll again be returned to the scan settings menu.
Document Name
When your Konica Minolta MFP is set to scan a PDF file and you’ve adjusted the appropriate settings for your document, you can give it a name by choosing the “Document Name” button. You’ll find this button on the left side of your scan settings menu. This will bring up a manual entry display that allows you to give the document a unique name before it is created and emailed. Once you have named the file, push OK to close that menu and push OK again on the scan settings menu.
Scan to Email
Once you have finalized the basic settings for your scan, you’ll need to identify the destination for your scan. You’ll be able to select the email destination for your project from the main screen of the Fax/Scan menu.
From this menu, select the "Direct Input” option for your scan destination options. These include scan-to-fax, scan-to-PC and scan-to-email. Choose scan-to-email.
An address book of available email addresses should be displayed on this screen if they have been programmed onto your Konica Minolta MFP. With the address book open, you can simply tap on the button for the recipient or destination you are looking for. In the event that there are no destinations in the address book, or your recipient isn’t listed, you can manually enter an email address. Once you have the email address selected/entered, you can push the START button and your project will scan and email the PDF files to the specified destination.
Here is a quick video tutorial for the Konica Minolta MFP, that shows the menu options and various selections you’ll have to make:
For more step-by-step guides and tutorials, as well as other technology insights and tips, subscribe to our blog.